With the release of Metroid Prime 4: Beyond , players will encounter a multitude of enemies to destroy, collectibles to find, and puzzles to solve. Ultimately, by collecting all the teleporter keys, you’ll reach the top of the Chrono Tower.
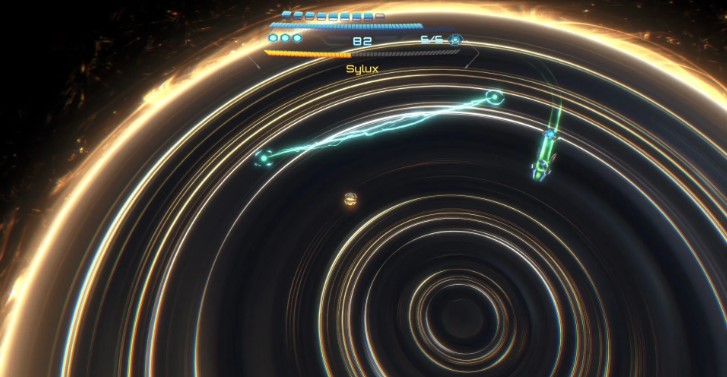
There, the final boss, Sylax , awaits you . However, unlike the robots he used throughout the campaign, this Sylax has a huge amount of health and new attacks that deal colossal damage. The fight is divided into three phases, and here’s how to defeat the final boss, Sylax, and finally complete the campaign of Metroid Prime 4: Beyond .
How to defeat Sylax
First phase
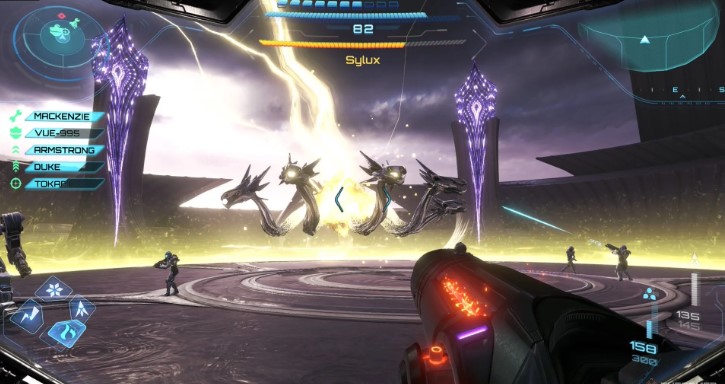
This time, Sylax isn’t joking.
At the start of the battle, Sylax will become invulnerable to all attacks, and three nano-arms will sprout from his body. Only the glowing green tips of these arms are vulnerable , so you’ll have to primarily use free aim to hit your target. At this point, Sylax essentially has only one attack: he swings his large nano-arms around, trying to hit you.
If your allies are knocked down, you need to revive them before Sylax deals fatal damage; otherwise, they’ll die, and the fight will end in defeat! Unfortunately, sometimes you’ll have to prioritize saving them over your own health.
Luckily, it doesn’t take much damage to destroy each arm individually. Once the tip of the nano-arm is destroyed , quickly approach it and use the Psy-Lasso to rip it off. This will enrage Sylax, who will begin chasing you around the arena, trying to ram Samus.
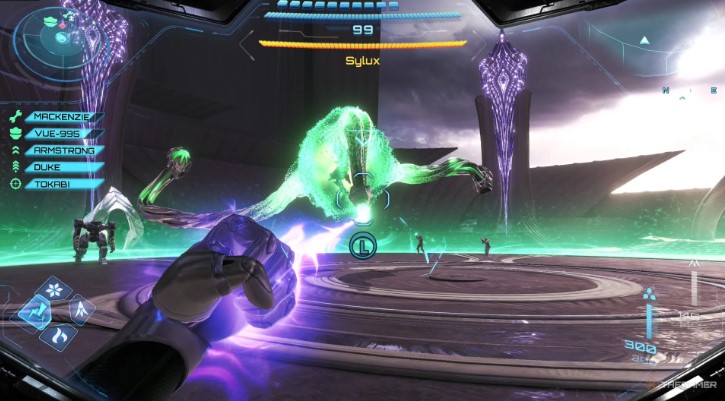
Repeat this process two more times until all three arms are severed. After this, Sylax will become vulnerable, giving you a short window of opportunity to fire missiles at him. After taking a small amount of damage, the nano-arms will regenerate, transforming into a dragon-like form!
In this mode, they are extremely unstable and can only be damaged by shooting at their giant metal heads . Their attacks now include a volley of three fireballs fired in an arc and slanted beams of fire around their body.
Most of these attacks can be avoided by simply keeping your distance from Sylax and allowing your allies to distract him. However, the fireballs leave small, temporary pools of lava on the ground , so be sure to move to another part of the arena after this attack.
Watch for the head to glow blue —that means it’s about to lunge forward to grab you! Getting caught in a grab will deal massive damage, so be ready to dodge.
After the dragon version of the nano-arms takes enough damage, they will revert to their original form, and an extra arm will sprout . Sylax will perform a new attack: he slams all four arms into the ground and begins spinning around the arena. This can be easily avoided by simply jumping over the arms with a double jump.
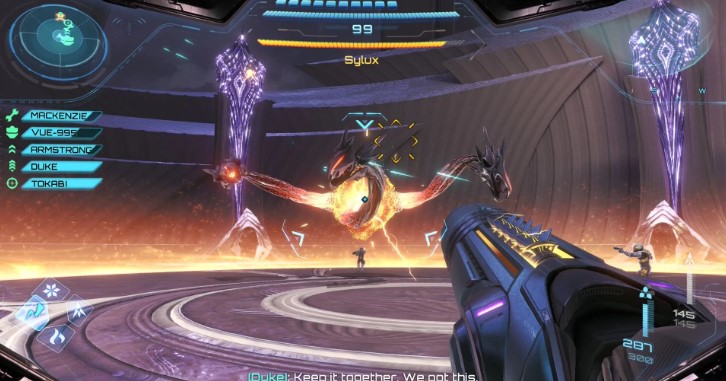
Focus again on destroying and ripping off each arm to open another window of damage during which you can whittle away some of Sylax’s health. Afterward, he’ll create new, icy versions of his nano-arms , which will offer two new moves.
This is a volley of icicles that will freeze Samus on impact, and a move that pulls you toward Sylax so he can strike you with his nano arm. The former can be avoided by simply continuously dodging in one direction around the arena, and the latter can be countered by holding back the left stick as he starts to pull you in .
Super Fire Shot is great for when he’s trying to pull you in, as the large spiral will hit multiple Nano Arms during this attack!
After taking enough damage or after a certain amount of time, his arms will revert to their original state, and you’ll need to repeat the process: destroy them, rip them off, and then fire at Sylax while he’s vulnerable. In this section, he’ll introduce a new move: he’ll spin around the arena like a top. Use the Morph Ball to quickly escape him while he’s chasing you.
After losing about 20% of his health, Sylax will unleash an electric version of his nano-arms . His attacks are simply bouncing, easily avoided, electric spheres and lightning strikes on the ground. If he uses this attack, look for purple circles on the ground and run to an area where there aren’t any. The speed ball is especially good for quick travel!
Unfortunately, your allies are quite bad at dodging this version’s attacks , so focus on keeping them alive rather than damaging the arm. You’ll mostly just have to wait this phase out to ensure your team doesn’t get eliminated when Sylax’s nano-arms return to normal.
Continue this way until Sylax loses enough health to trigger a cutscene and transition you to the next phase.

Second phase
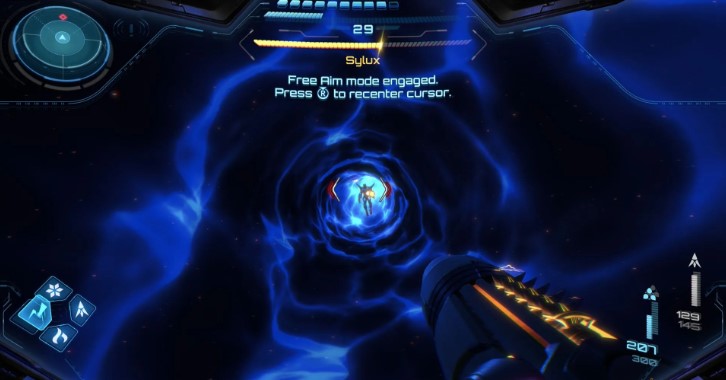
After taking about 40% damage, Sylax will open a wormhole and pull Samus into it. Good news: no more coddling soldiers!
This section is simple, if a little odd. It’s essentially a rail fight where you can only move Samus up, down, left, and right.
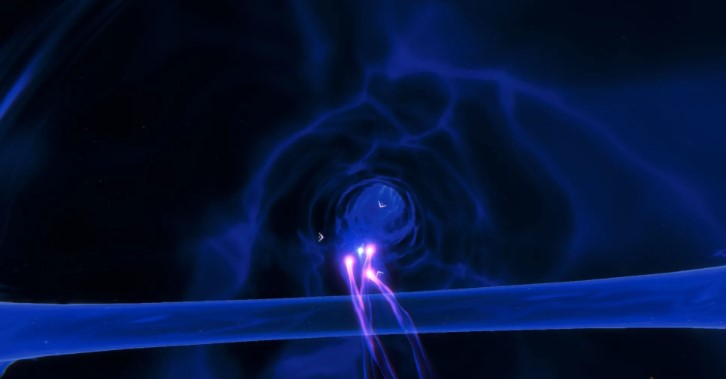
During this phase, shoot at Sylax while you’re both falling, and watch for him to summon energy blades from the walls. You’ll have just enough time to dodge them by moving the left stick in the opposite direction.
Additionally, Sylax will attack with blaster shots and a psychic whip. Both attacks can be dodged by moving away from the direction from which he launches them.
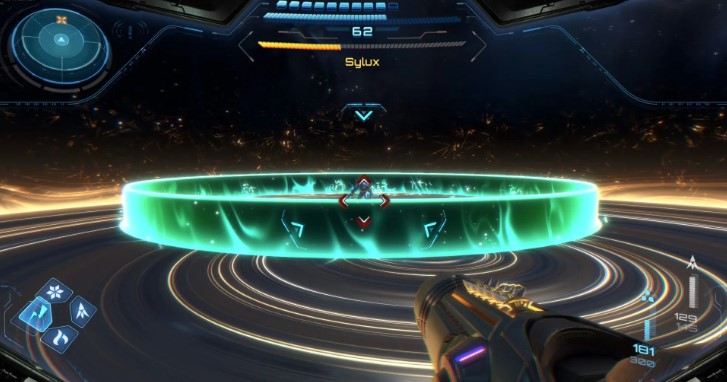
The only tricky part is the pair of spinning blades in his arsenal, which are impossible to avoid normally. To avoid taking damage, direct the control beam through the spinning blades and hit Sylax in the back to stun him and interrupt this attack!
Shooting Sylax will net quite a few health packs, so this is a good time to recover from the damage taken in the first phase.
Continue to fire at Sylax until his health drops to around 50% to force him into the final phase.
The third phase
The third phase will play out similarly to the two previous encounters with Sylax in the game . He’ll be vulnerable at all times, but will use a variety of attacks against you during this phase. The key to victory is understanding his attack pattern and knowing when to counter.
Here’s a breakdown of his attacks:
Here’s a breakdown of his attacks:
| Attack | Description |
|---|---|
| Energy strike | Sylax slams the ground, creating a powerful shockwave in all directions that must be double-jumped over. |
| Energy beam | Sylax fires a solid beam at torso level, 180 degrees in front of him. This can be avoided by transforming into a Morph Ball. Later, he’ll begin mixing beams aimed at his legs, which he’ll have to jump over. |
| Energy Surge | He charges forward, releasing a wave of energy ahead of him. It can be avoided by transforming into a Morph Ball and rolling underneath it. |
| Energy wave | Sylax swipes his cannon across the ground, creating a small vertical wave of energy in front of him. It can be dodged by dashing left or right before impact. |
| Capture | Sylax moves to the center of the arena and begins charging his cannon. When fully charged, he unleashes an energy whip that latches onto Samus. To avoid this, transform into a Morph Ball and continuously accelerate along the edge of the arena. |
| Absorption of beam | Sylax teleports around the arena, absorbing all attacks into what appears to be a giant eye. Activate your visor and fire the Control Beam at his body to stun him and interrupt this attack. |
| Stealing the Morph Ball | Sylax transforms into a Morph Ball and rams you, stealing one Energy Tank. You can ram him back with a Boost Ball to knock out the tank and take it. |
| Electric barriers | While in Morph Ball mode, Sylax leaves behind electric barriers that must be avoided by driving around them. |
When the fight begins, switch to your preferred element and start firing at Sylax as he moves around the arena. During the first part of this battle, he’ll primarily use a combination of Energy Beam, Dash, Slam, and Wave . All of these attacks are fairly easy to avoid if you keep your distance.
Keeping your distance will give you plenty of time to react, as his attacks usually have a long buildup that serves as a clue as to how to dodge. Focus on peppering him with missiles or charged shots until he enters his Morph Ball form.
When this happens, Sylax will begin charging his own Boost Throw and fly at you. If it hits, it will not only stun you but also knock out one of your Energy Tanks . He’ll steal it and start rolling around the arena. Use your Boost Ball to catch up and ram him . This will force him to release his Energy Tank, giving you time to plant a few bombs near his body.
After recovering from the stun, he usually returns to his normal form. Do the same and resume dodging his attacks, continuing to drain his health bar.
Eventually, Sylax will teleport out of the arena and return with his cannon raised to the sky. If you see an eye-shaped energy form above him , switch to your visor and fire a charged Control Beam at him . This is the only move his attack won’t absorb! Remember to aim the shot at Sylax himself, not where he’s forming the attack.
The rest of the fight won’t change much , as Sylax sticks to the moves listed above, only increasing the number of times he can launch them simultaneously. This makes him a fairly straightforward opponent, as he doesn’t introduce any major new mechanics or attacks as his health depletes.
After defeating Sylax, a cutscene will play and you will finally reach the very end of Metroid Prime 4: Beyond !