Nioh 3 is out , which means it’s time to sharpen your katana, rescue friendly Kodama, and try to survive while almost everything around you is trying to kill you. At the top of the food chain is a vast roster of bosses, and those connected to the main story are among the trickiest to defeat.
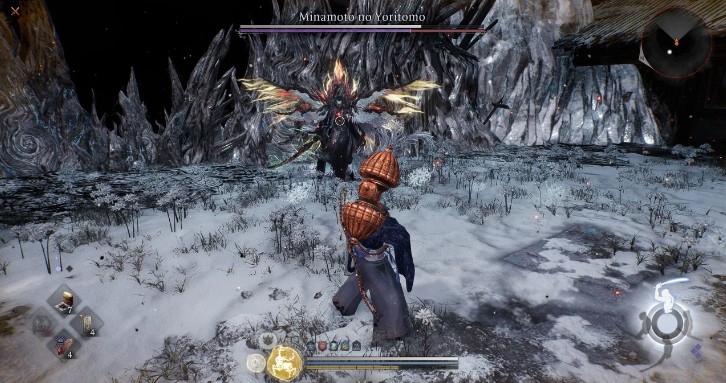
One of them is Minamoto no Yoritomo, the final boss of Act II, who can wipe out your health bar if you’re unprepared. Here’s what you need to know to successfully defeat Minamoto no Yoritomo.
How to defeat Minamoto no Yoritomo
Before this boss fight, I recommend equipping anything that can provide wind resistance, as well as using items that boost your damage or weaken Yoritomo’s defense. I also recommend using any spell or weapon with lightning damage to try to apply this elemental effect and slow him down, as he’s quite mobile.
Once the battle begins, Yoritomo will use his weapon’s range and mobility to pressure you with attacks. His main moves include a series of blade strikes (which can be blocked), launching a column of wind at you, and dashing across the arena for a double strike.
The final maneuver has both a ki burst (Burst Break) and a regular version. Yoritomo lowers his blade, then dashes across the room to strike you horizontally, before turning around to strike again. If it’s the ki burst version, he’ll glow red as he appears to sheathe his blade. You can parry this by switching stance on both the first and second hits of this attack, so if you miss the initial strike, be ready to parry the quick follow-up attack.
If it’s the normal version, you’ll need to dodge or block both hits.
This attack only deals physical damage, and he moves too quickly to counter, so the best tactic is to play defensively. Another serious attack that’s best avoided is when he raises his sword over his head and then brings it down in front of him. This splits the ground and releases a linear wave of wind energy. If you’re not close to him, your best option is to roll to either side, as this move deals massive damage.
His grab is also one of the easiest to dodge in the game: he flies into the air, hovers, and then dives straight down to grab you. Simply roll past him and turn around—you’ll have time to land a few hits while he recovers!
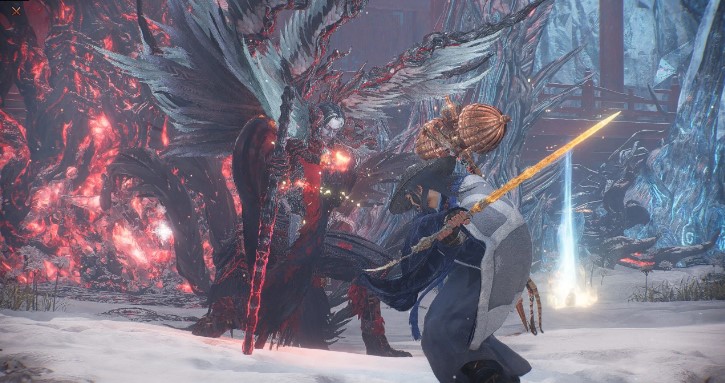
Upon entering the Dark Realm, Yoritomo will imbue his sword with wind energy, meaning all his attacks will deal both elemental and physical damage , making blocking less advantageous. He’s very vulnerable during the transition animation, so it’s a great time to unleash a powerful combo of attacks before he launches his attack.
Yoritomo’s new, powerful attack goes like this: he hovers in midair, launches four crescent-shaped wind projectiles, and then slams down, creating a line of wind energy in front of him. This move, while intimidating, is actually not that hard to survive if you don’t panic. When he launches the projectiles, position yourself between them and shift slightly to the right twice, then to the left, to avoid all four. Immediately after dodging the fourth projectile, immediately roll to either side to avoid the wave of wind energy.
Another move worth remembering is when he spins around twice, releasing small circles of wind around his entire body. This maneuver can be difficult to dodge, as it’s executed quickly, and the only clue to the animation is that Yoritomo first thrusts his sword forward, followed by a series of wind disks.
When Yoritomo returns to the overworld, he gains the ability to launch multiple wind disks from his sword at you. They move quite slowly and can be dodged by rolling or dashing in any direction as soon as you see them. He also performs a frontal slash, which actually hits twice in a 180-degree arc in front of him. If you see Yoritomo raise his sword over his head and begin spinning, it means he’s about to perform this move.
Finally, I strongly advise against using your Living Artifact while Yoritomo is in the Dark Realm. While it may seem ideal to try to bring him out of this phase quickly, the sheer number of his area-of-effect attacks will quickly deplete your Amarita meter if you simply absorb the hits. Yoritomo is much easier to suppress outside of the Dark Realm, allowing you to maximize your damage output while in this form.
Once Yoritomo’s health bar is depleted, he’ll drop to one knee, and you’ll need to land a critical hit. This will trigger a short cutscene where you’ll perform a spectacular series of attacks to finish him off.